Farming is an important component of Minecraft gameplay that entails producing crops and rearing animals in order to ensure survival and obtain necessary resources. It offers several benefits that help a player’s overall advancement and success inside the game environment, going beyond simply nourishment.
Farming is an important part of a player’s survival in Minecraft. Players may secure a stable source of food by planting crops and breeding animals, removing the need for frequent exploration and hunting for nourishment. Farming offers a consistent and sustained supply of nutrition, lowering the danger of starving and allowing players to focus on other activities and challenges.
Overall, farming in Minecraft has various advantages, including a sustainable food source, renewable resources, and the opportunity to focus on other elements of gameplay without having to constantly hunt or collect materials. It enables players to become self-sufficient, grow more quickly, and completely immerse themselves in Minecraft’s diverse universe.
- Starting Your Farm in Minecraft
- Planting and Growing Crops in MinecraftCrop varieties
- Crop varieties
- Harvesting CropsHow to identify fully grown crops based on their appearance? in Minecraft WheatCarrots:Potatoes:Beetroot:Process of harvesting crops and obtaining crop items in Minecraft
- How to identify fully grown crops based on their appearance? in Minecraft
- Wheat
- Carrots:
- Potatoes:
- Beetroot:
- Process of harvesting crops and obtaining crop items in Minecraft
- Animal Farming Basics in MinecraftTypes of AnimalsYield of Animal Resources:Leading Animals into the Enclosures and Breeding Process in Minecraft
- Types of Animals
- Yield of Animal Resources:
- Leading Animals into the Enclosures and Breeding Process in Minecraft
- Managing and Maintaining Your Farm
- Advanced Farming TechniquesCrop Harvesting Automation Using Redstone Mechanisms:Designing Complex Animal Breeding Systems
- Crop Harvesting Automation Using Redstone Mechanisms:
- Designing Complex Animal Breeding Systems
- Conclusion
Starting Your Farm in Minecraft
Finding a proper site for your Minecraft farm is critical to its success and efficiency. Here are the main reasons why location is important, as well as aspects to consider:
- Space: An ample room is essential for developing your farm and housing a range of crops and animals.Consider the size of the area and if it allows for future expansion and diversification of your farming activities. A larger farm allows you to grow more crops, raise more animals, and produce more resources overall.Terrain that is flat: A flat terrain gives your farm a firm foundation, making designing organised and planned layouts more straightforward. The flat ground makes it easier to work the soil, cultivate crops, and construct animal cages. It also aids in irrigation systems, walkway design, and making the best use of available areas.
- An ample room is essential for developing your farm and housing a range of crops and animals.Consider the size of the area and if it allows for future expansion and diversification of your farming activities.
- A larger farm allows you to grow more crops, raise more animals, and produce more resources overall.Terrain that is flat:
- A flat terrain gives your farm a firm foundation, making designing organised and planned layouts more straightforward.
- The flat ground makes it easier to work the soil, cultivate crops, and construct animal cages.
- It also aids in irrigation systems, walkway design, and making the best use of available areas.
- Accessibility: Select a place that is conveniently accessible from your base or major operating area. The proximity of the farm reduces the time and effort necessary to go back and forth, allowing for more effective management and upkeep. It guarantees that crops, livestock, and resources are available whenever they are required.Lighting and sunlight: Make sure your farm gets plenty of sunlight during the day. Because crops require light to thrive, having an open space that is exposed to sunshine promotes healthy growth and faster crop maturation. If your farm is in a region where natural sunshine is scarce, consider employing artificial lighting sources such as torches or lamps to complement the light requirements.
- Select a place that is conveniently accessible from your base or major operating area.
- The proximity of the farm reduces the time and effort necessary to go back and forth, allowing for more effective management and upkeep.
- It guarantees that crops, livestock, and resources are available whenever they are required.Lighting and sunlight:
- Make sure your farm gets plenty of sunlight during the day. Because crops require light to thrive, having an open space that is exposed to sunshine promotes healthy growth and faster crop maturation.
- If your farm is in a region where natural sunshine is scarce, consider employing artificial lighting sources such as torches or lamps to complement the light requirements.
- Water proximity: Water is vital for farming because it keeps farmland hydrated and speeds up crop development. Look for a place near a body of water, such as a river, lake, or man-made water feature. It is easier to establish irrigation systems or get water for animal farms when there is water nearby.
- Water is vital for farming because it keeps farmland hydrated and speeds up crop development.
- Look for a place near a body of water, such as a river, lake, or man-made water feature.
- It is easier to establish irrigation systems or get water for animal farms when there is water nearby.
- Considerations for Aesthetics: While it is not required for functioning, the appearance of your farm might improve your overall play experience. Consider selecting a place that compliments the surrounding surroundings or corresponds to your chosen concept or style. An aesthetically pleasing farm may provide happiness and a sense of accomplishment.
- While it is not required for functioning, the appearance of your farm might improve your overall play experience.
- Consider selecting a place that compliments the surrounding surroundings or corresponds to your chosen concept or style.
- An aesthetically pleasing farm may provide happiness and a sense of accomplishment.
In Minecraft, clearing the ground and tilling the soil are critical phases in constructing a fruitful farm. Here’s how you clear the ground and till the soil using a hoe:
- Examine the Situation: Determine the borders of your intended agricultural space by surveying the area you have picked for your farm.Remove any impediments to the farm’s development, such as thick grass, flowers, trees, or other undesired blocks.
- Determine the borders of your intended agricultural space by surveying the area you have picked for your farm.Remove any impediments to the farm’s development, such as thick grass, flowers, trees, or other undesired blocks.
- Land Clearance: Begin by breaking up tall grass, flowers, and other plants with your hands or a tool. If there are trees or other larger barriers, use an axe to cut them down and clear the space. Collect any fallen wood and other materials for later use.
- Begin by breaking up tall grass, flowers, and other plants with your hands or a tool.
- If there are trees or other larger barriers, use an axe to cut them down and clear the space. Collect any fallen wood and other materials for later use.
- Gather Your Resources: Obtain a hoe, which is the tool used in Minecraft to plough the soil and produce farms. For improved durability, make a wooden hoe out of planks or upgrade to a stronger material such as stone, iron, diamond, or nephrite.
- Obtain a hoe, which is the tool used in Minecraft to plough the soil and produce farms.
- For improved durability, make a wooden hoe out of planks or upgrade to a stronger material such as stone, iron, diamond, or nephrite.
- Tilling the Ground: When the land is clear, choose your hoe from the Hotbar and right-click on it. The dirt blocks will turn into farmland, which will be denoted by a darker brown colour. Crops require farmland rather than normal dirt, therefore tilling the soil is required.
- When the land is clear, choose your hoe from the Hotbar and right-click on it.
- The dirt blocks will turn into farmland, which will be denoted by a darker brown colour.
- Crops require farmland rather than normal dirt, therefore tilling the soil is required.
- Farmland Understanding: Farmland keeps the soil moist, which aids crop development. Place a water supply nearby to ensure that your field is hydrated. Even in arid biomes, farmland near four blocks of water will remain wet. Farmland may be readily harmed if trod on or jumped on, therefore avoid trampling wherever possible.
- Farmland keeps the soil moist, which aids crop development.
- Place a water supply nearby to ensure that your field is hydrated. Even in arid biomes, farmland near four blocks of water will remain wet.
- Farmland may be readily harmed if trod on or jumped on, therefore avoid trampling wherever possible.
- Increasing the Size of Your Farm: After establishing the original farmland, you may extend it by tilling neighbouring soil blocks. Before tilling the soil, remove any surplus grass or other undesired obstructions in the expansion area.
- After establishing the original farmland, you may extend it by tilling neighbouring soil blocks.
- Before tilling the soil, remove any surplus grass or other undesired obstructions in the expansion area.
Planting and Growing Crops in Minecraft
Successful farming requires gathering seeds from tall grass and recognising the many crop varieties accessible in Minecraft. Here’s a step-by-step approach to collecting seeds, as well as a summary of the crop types:
Locating Tall Grass:
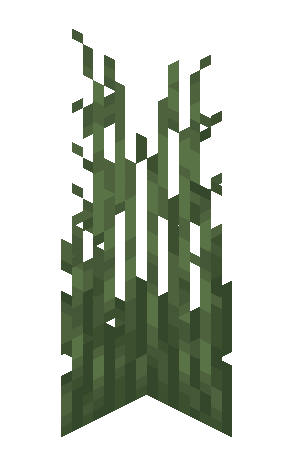
Explore the Minecraft world and seek tall grass, which is widespread in plains, woods, and other biomes.
Tall grass looks like taller green bricks than typical grass blocks.
Tall Grass Breaking:
Approach the thick grass and shatter the tall grass block with your hand or any tool (such as shears or a sword).
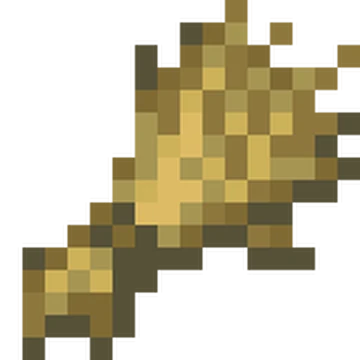
Breaking the tall grass block may result in the drop of seeds as an item.

Getting Seeds:
Tall grass has the potential to shed seeds when broken.
Walk over the seeds or use the “pick up” key/button while standing close to collect them.
Because each tall grass block might drop numerous seeds, you should continue the process to collect more.
Farming Productivity:
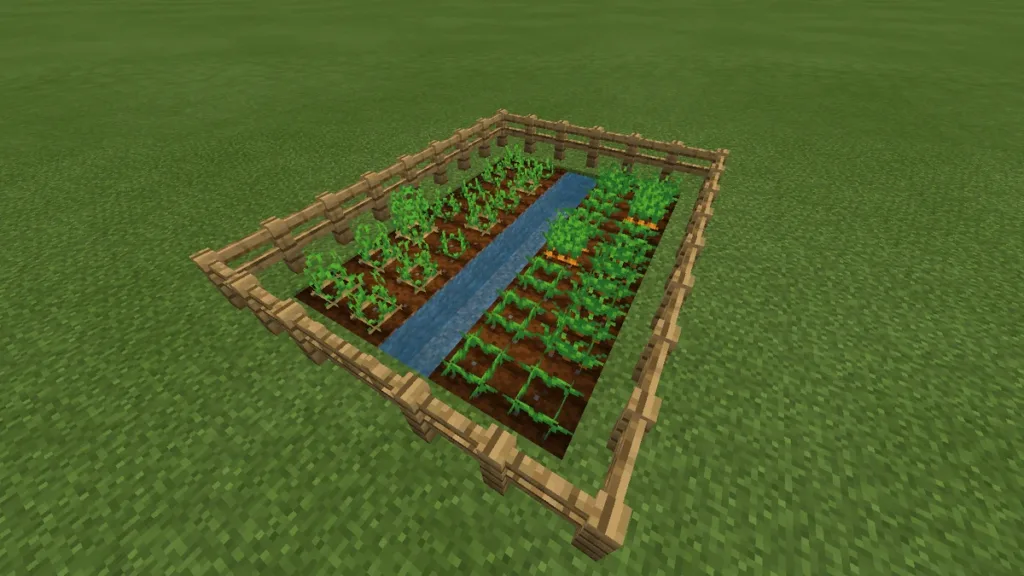
Consider constructing different sections or plots for each crop variety to maximise agricultural efficiency.
Plant the seeds in straight rows or organised patterns to make harvesting and replanting easier.
Crop varieties
Several crop varieties may be cultivated in Minecraft using the seeds you get. The following are the major crop types:
Wheat is the most widely grown and adaptable crop. It is cultivated from seeds and used to make bread, cake, and cookies. Wheat is also used in the breeding of certain animals.

Carrots: Another crop that may be produced from seeds is carrots. They are an excellent source of food and may also be used to produce and manage pigs.

Potatoes are a starchy crop that is cultivated from seeds. They are a wonderful source of protein and may be cooked or used to make other foods such as baked potatoes.

Beetroot: A crop that may be cultivated from beetroot seeds is a beetroot. It is mostly used as a food source, but it may also be used to make beetroot soup.
Understanding how to collect seeds from tall grass and the various crop varieties available allows you to create a diversified and fruitful farm in Minecraft. Experiment with producing different crops to maintain oneself, breeding animals, and crafting a variety of food and supplies.
Planting seeds in Minecraft is a straightforward activity that entails gathering seeds from tall grass and carefully depositing them on tilled soil. Crops rely on two critical conditions for healthy development once planted: appropriate lighting and water sources. Lighting is critical since crops need a light level of at least 8 to 12 to flourish.
Natural sunshine is best throughout the day, but if the farm is shaded, torches or other light sources placed nearby can give the required illumination. Water sources are critical in keeping farms hydrated and ensuring optimal development.
To keep wet, each farming block must be within four blocks of a water supply. Setting up a local water supply or designing irrigation systems with water channels aids in the uniform distribution of water to the crops. Players can nurture healthy crops, maintain a steady food source, and maximise agricultural efficiency in Minecraft by prioritising enough lighting and water.
Crops in Minecraft go through various phases of development before they mature and are ready for harvest. The following are the phases of crop development and the approximate time it takes for crops to mature:

- Stage 1: Seeding/Planting: The crops enter the early stage of growth after being planted on tilled fields.The crops emerge at this stage as little sprouts just break through the earth.
- The crops enter the early stage of growth after being planted on tilled fields.The crops emerge at this stage as little sprouts just break through the earth.
- Stage 2: Development: The crops continue to grow, and the sprouts mature into taller, more distinct plants.This stage is distinguished by the plants getting higher but producing no apparent output.
- The crops continue to grow, and the sprouts mature into taller, more distinct plants.This stage is distinguished by the plants getting higher but producing no apparent output.
- Pre-Mature (Stage 3): As the crops grow, they reach the pre-mature stage, signalling that they are about to be harvested.The plants grow larger and more fully developed at this time, revealing the visual traits of the specific crop kind.
- As the crops grow, they reach the pre-mature stage, signalling that they are about to be harvested.The plants grow larger and more fully developed at this time, revealing the visual traits of the specific crop kind.
- Stage 4: Fully developed/mature: The crops achieve full maturity and are ready for harvest after a particular period of time.Fully developed crops, such as wheat turning golden and carrots and potatoes exhibiting visible product above ground, have different features.
- The crops achieve full maturity and are ready for harvest after a particular period of time.Fully developed crops, such as wheat turning golden and carrots and potatoes exhibiting visible product above ground, have different features.
Crop maturation duration varies based on crop type and the game’s random tick updates. Here are some rough estimates for crop maturity:
- Wheat: It takes 8 to 10 minutes to attain full maturity.
- Carrots and potatoes: It takes around 8 to 10 minutes for them to attain full development.
- Beetroot: It takes around 10 to 15 minutes to fully mature.
It should be noted that these timeframes are estimates and may vary owing to variables such as random tick updates and game settings.
Players may properly organise their agricultural efforts in Minecraft by understanding the stages of crop growth and the expected time it takes for crops to mature. This ensures timely harvests and a sustainable food source.
Harvesting Crops
How to identify fully grown crops based on their appearance? in Minecraft
Different crops in Minecraft have distinct looks that allow players to tell when they are fully grown and ready for harvest. Here’s how to recognise fully developed crops based on their appearance:
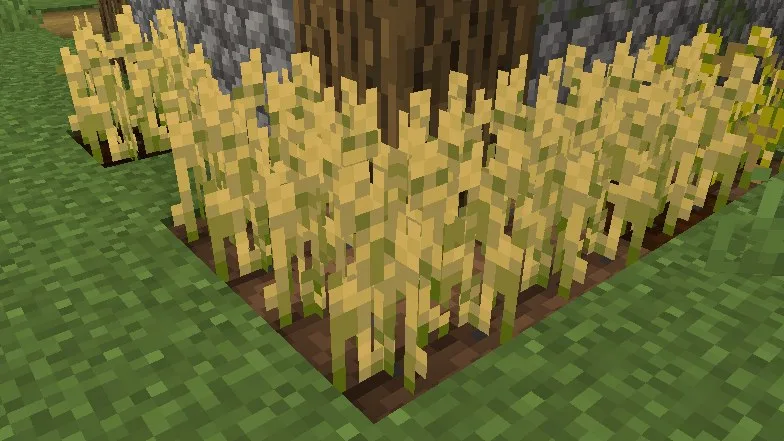
Wheat
Wheat harvests are golden when fully developed.
The stalks will have turned yellow and grown to their full height.
At the top of the stalks, players can see wheat heads developing.
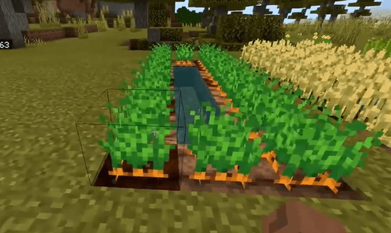
Carrots:
Carrot crops that have reached full maturity will be brilliant orange above ground.
Carrot tops will be completely mature and visible.
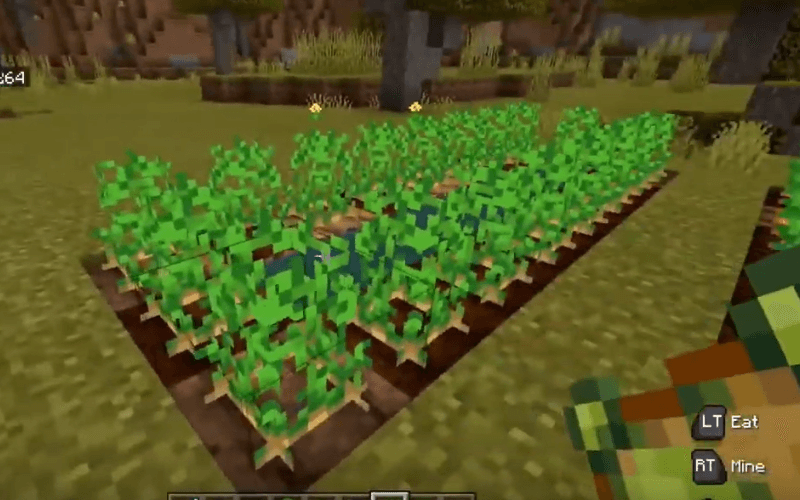
Potatoes:
Above ground, fully developed potato crops have a brownish hue.
The potato plants will wither and ripe potato tops will be visible to players.
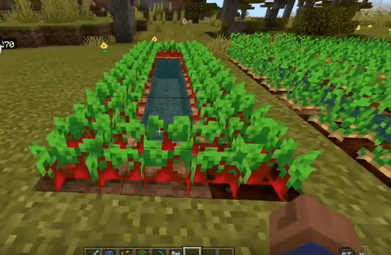
Beetroot:
Above ground, fully developed beetroot crops are a rich red colour.
The beetroot plants will have developed leaves and prominent beetroot clusters.
Process of harvesting crops and obtaining crop items in Minecraft
Harvesting crops in Minecraft is a simple operation that entails breaking fully grown plants to receive agricultural items. Here’s a guide to harvesting crops and obtaining agricultural items:
- Recognise Fully Grown Crops: Based on the various visual cues discussed previously, examine the look of the crops to determine if they have attained full maturity.
- Based on the various visual cues discussed previously, examine the look of the crops to determine if they have attained full maturity.
- Choose an Appropriate Tool: A specialised instrument is not required to harvest crops. Using a tool with the Fortune enchantment, on the other hand, can boost the yield of harvest goods acquired.
- A specialised instrument is not required to harvest crops. Using a tool with the Fortune enchantment, on the other hand, can boost the yield of harvest goods acquired.
- How to Approach the Crops: Get as close to the fully grown crops as possible.
- Get as close to the fully grown crops as possible.
- Cut the Crops: To shatter the fully developed crop, press the left-click or assault button on your mouse or controller. Aim towards the crop and strike it with your chosen tool or your bare hand.
- To shatter the fully developed crop, press the left-click or assault button on your mouse or controller.
- Aim towards the crop and strike it with your chosen tool or your bare hand.
- Get Crop Items: It will drop crop goods after breaking the crop, which you may gather. To collect the dropped things, walk over them or use the “pick up” key/button.
- It will drop crop goods after breaking the crop, which you may gather.
- To collect the dropped things, walk over them or use the “pick up” key/button.
- Rep the procedure: Repeat the harvesting processes for the next fully developed crop. Continue to harvest all mature crops on your farm or in your allocated region.
- Repeat the harvesting processes for the next fully developed crop.
- Continue to harvest all mature crops on your farm or in your allocated region.
- Optional replanting: Consider replacing seeds in unoccupied lands after harvesting crops to maintain a sustainable farm. To sow the seeds, choose them from your inventory and right-click on the tilled farmland.
- Consider replacing seeds in unoccupied lands after harvesting crops to maintain a sustainable farm. To sow the seeds, choose them from your inventory and right-click on the tilled farmland.
- To sow the seeds, choose them from your inventory and right-click on the tilled farmland.
Animal Farming Basics in Minecraft
In Minecraft, animal husbandry is the practice of breeding and maintaining animals in order to get different resources such as food, minerals, and even friendship. Here’s a summary of the animal farming idea in Minecraft:
Types of Animals
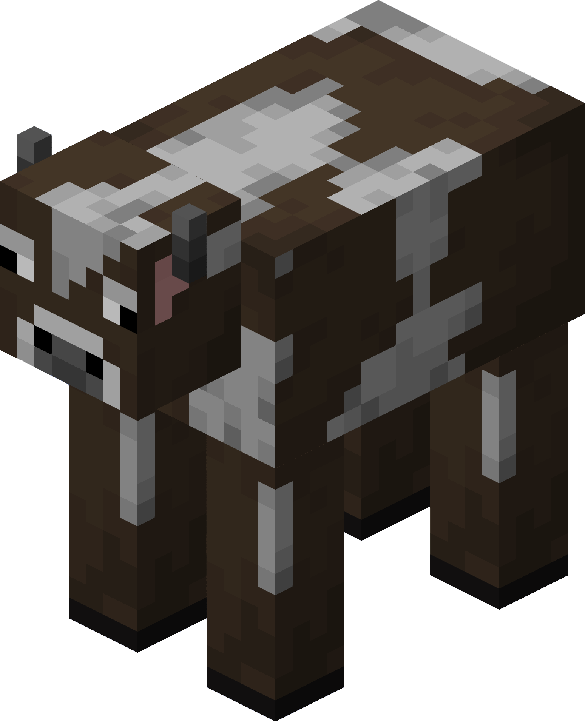
Cows
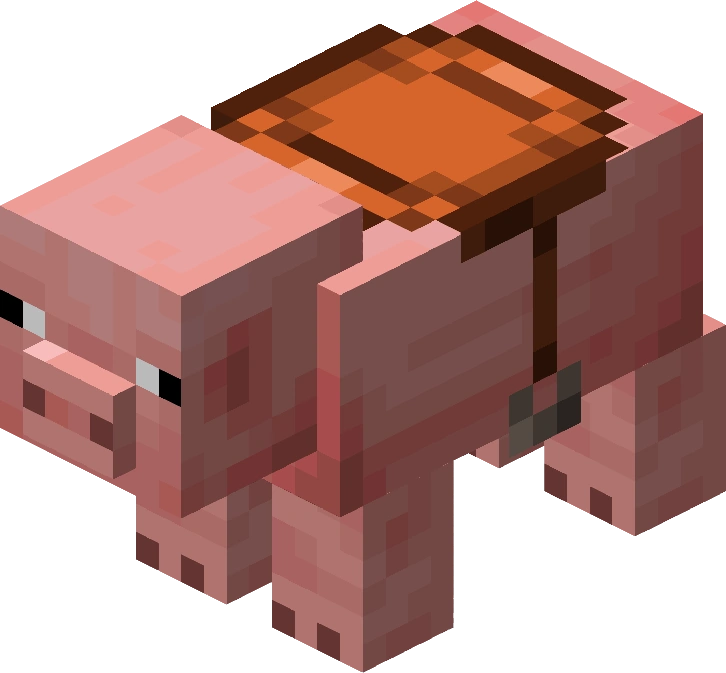
Pigs
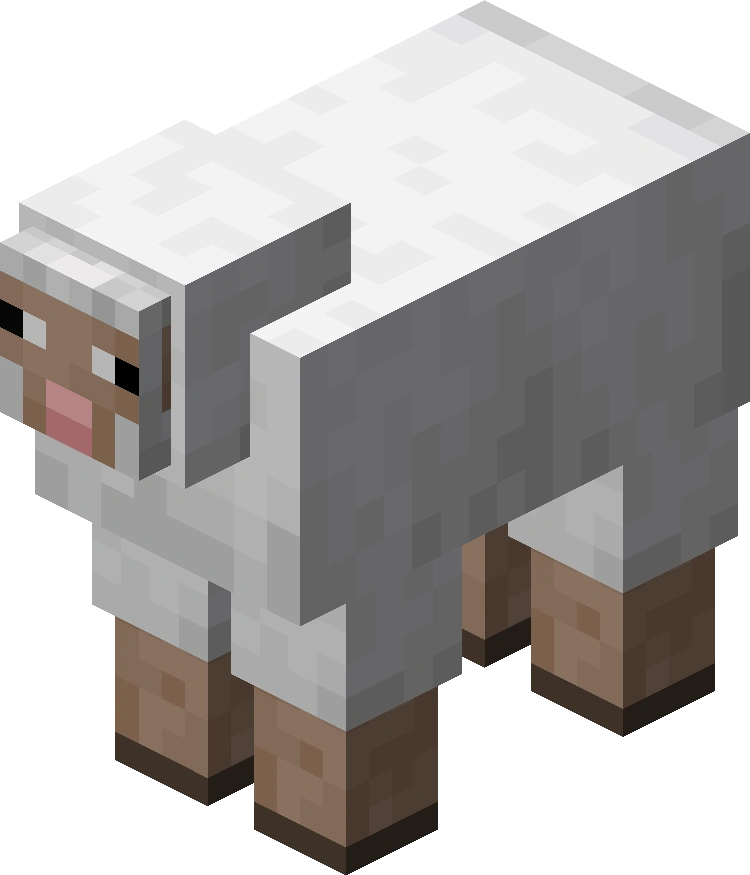
Lambs
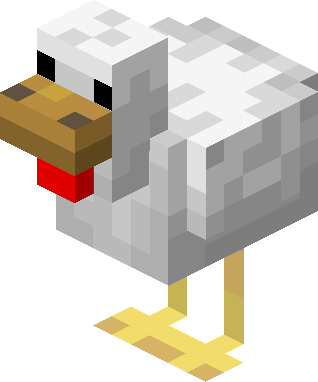
Chickens
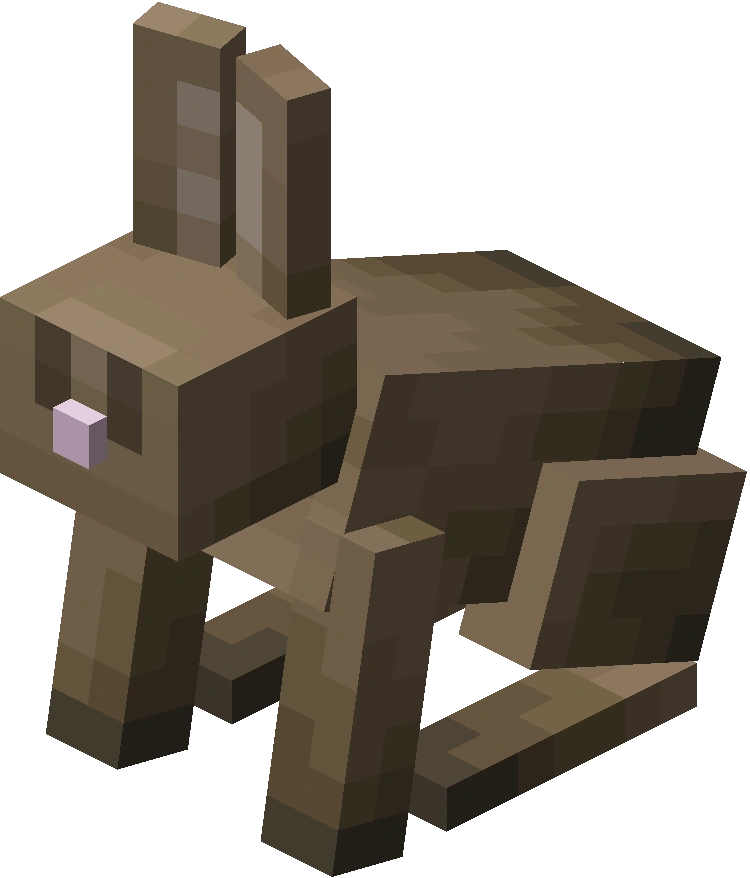
Rabbits are among the animals that may be farmed in Minecraft. When farmed, each animal delivers distinct resources and advantages.
- Breeding of animals: Animal breeding is an important part of animal production. Offspring can be produced by breeding two animals of the same species. Animals may be reared by providing them with certain foods. Cows and sheep, for example, are bred with wheat, while pigs are bred with carrots or potatoes, chickens with seeds, and rabbits with carrots or dandelions.
- Animal breeding is an important part of animal production. Offspring can be produced by breeding two animals of the same species.
- Animals may be reared by providing them with certain foods. Cows and sheep, for example, are bred with wheat, while pigs are bred with carrots or potatoes, chickens with seeds, and rabbits with carrots or dandelions.
- Pens and Enclosures: Create adequate cages or pens for your animals to reside in before you begin animal husbandry. Build fences or walls around an area to keep animals contained and safe from predators. Allow adequate space for the animals to move about comfortably.
- Create adequate cages or pens for your animals to reside in before you begin animal husbandry.
- Build fences or walls around an area to keep animals contained and safe from predators.
- Allow adequate space for the animals to move about comfortably.
- Providing Food for Animals: Animals need to be fed in order to be healthy and procreate. Different animals have different dietary requirements. Cows, for example, consume wheat, pigs eat carrots or potatoes, sheep eat grass and can be painted various colours, chicks eat seeds, and rabbits eat carrots or dandelions. To feed the animal, hold the relevant food item in your hand and right-click on it.
- Animals need to be fed in order to be healthy and procreate.
- Different animals have different dietary requirements. Cows, for example, consume wheat, pigs eat carrots or potatoes, sheep eat grass and can be painted various colours, chicks eat seeds, and rabbits eat carrots or dandelions.
- To feed the animal, hold the relevant food item in your hand and right-click on it.
- Animal Management: Animal husbandry entails controlling and preserving your animals’ health. Check on your animals on a regular basis to ensure they are healthy and not overcrowded. Maintaining healthy and productive animals requires proper illumination, space, and access to water sources.
- Animal husbandry entails controlling and preserving your animals’ health.
- Check on your animals on a regular basis to ensure they are healthy and not overcrowded.
- Maintaining healthy and productive animals requires proper illumination, space, and access to water sources.
Yield of Animal Resources:
Animal farming supplies a variety of resources, including:

Cows: Can be milked using a bucket to get milk, or slaughtered to get meat and leather.

Pigs: Can be slaughtered to acquire pork chops for cooking.

Sheep: Sheep may be sheared using shears to get wool, which can be dyed in various colours.

Chickens lay eggs that may be eaten, tossed to hatch new chickens, or utilised in a variety of crafting methods.


Rabbits: When killed, drop the rabbit’s foot, rabbit skin, and uncooked rabbit.
Animal husbandry in Minecraft not only produces necessary materials but also adds life and bustle to the game. It lets you grow your farm and experience the advantages of producing and caring for animals in the virtual world of Minecraft by creating sustainable food sources, obtaining resources, and engaging in animal breeding.
Leading Animals into the Enclosures and Breeding Process in Minecraft
Leading animals into an enclosure with food and understanding the natural breeding process when there are two or more animals of the same sort are crucial components of Minecraft animal husbandry. Here’s some information about leading animals and the breeding process:
- Animals Entering the Enclosure: Hold the food item that the animal is drawn to in your hand. Wheat for cows and sheep, carrots or potatoes for pigs, seeds for chickens, and carrots or dandelions for rabbits, for example. Approach the animal you wish to lead and right-click it while holding the food item in your hand.The animal will be drawn to the food and will begin to pursue you.
- Hold the food item that the animal is drawn to in your hand. Wheat for cows and sheep, carrots or potatoes for pigs, seeds for chickens, and carrots or dandelions for rabbits, for example.
- Approach the animal you wish to lead and right-click it while holding the food item in your hand.The animal will be drawn to the food and will begin to pursue you.
- Getting the Animal Moving: Lead the animal to your selected cage or pen as it follows you. Make sure the enclosure has a large enough entrance or opening for the animal to enter. Bring the animal into the enclosure through the entrance. Close the gate once inside to keep the animal from fleeing.
- Lead the animal to your selected cage or pen as it follows you.
- Make sure the enclosure has a large enough entrance or opening for the animal to enter.
- Bring the animal into the enclosure through the entrance.
- Close the gate once inside to keep the animal from fleeing.
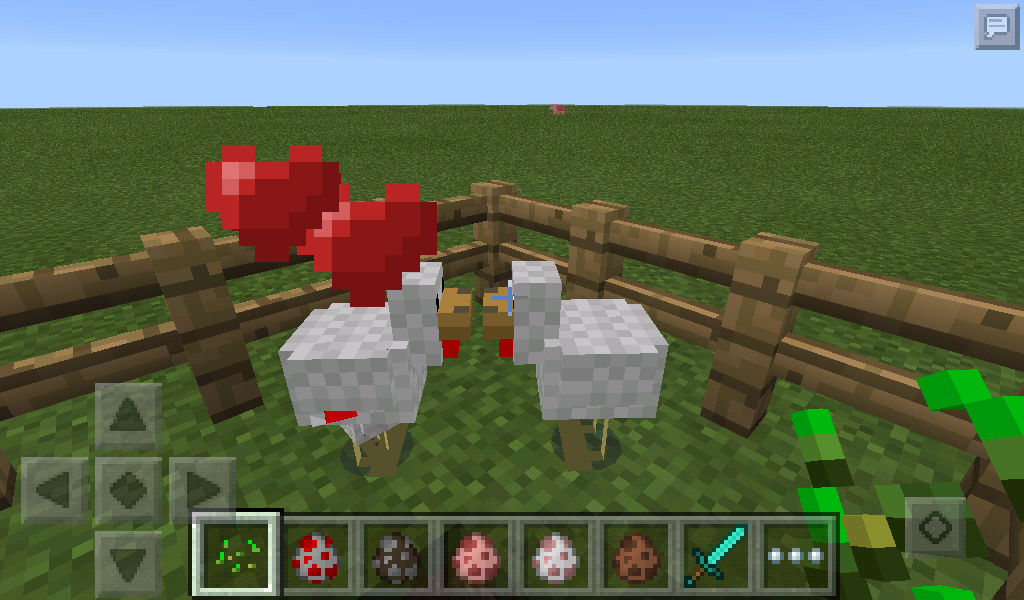
- Breeding Procedure: To breed animals, you must have two or more of the same species. Make sure the animals are close to one another, either in the same enclosure or in surrounding enclosures. Feed each animal its own food item. When you right-click on one of the animals while holding the food item, hearts appear over their heads. If the breeding is successful, the animals will go into “love mode” and soon create a newborn animal.
- To breed animals, you must have two or more of the same species.
- Make sure the animals are close to one another, either in the same enclosure or in surrounding enclosures.
- Feed each animal its own food item. When you right-click on one of the animals while holding the food item, hearts appear over their heads.
- If the breeding is successful, the animals will go into “love mode” and soon create a newborn animal.
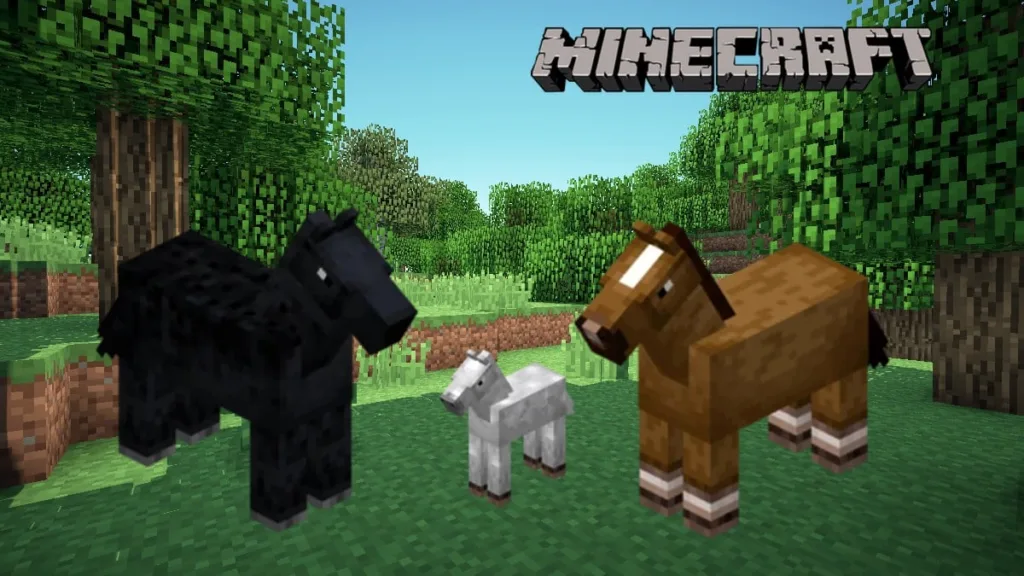
- Animals in their infancy: Once the animals have successfully bred, they will give birth to a newborn animal of their kind. The infant animal will inherit characteristics from its parents and will mature into an adult over time. Make sure there is enough room and resources for the rising animal population.
- Once the animals have successfully bred, they will give birth to a newborn animal of their kind.
- The infant animal will inherit characteristics from its parents and will mature into an adult over time.
- Make sure there is enough room and resources for the rising animal population.
Understanding the process of leading animals using food items and the natural breeding mechanics in Minecraft allows you to establish and expand your animal farm. By carefully managing the breeding process and providing proper care for your animals, you can maintain a healthy and thriving population, ensuring a sustainable source of resources and enjoyment in your Minecraft world.
Managing and Maintaining Your Farm
Managing and sustaining a successful Minecraft farm involves careful planning and attention to a variety of things. Here are some pointers to help you manage and maintain your farm more effectively:
- Farm Organisation: Plan up your farm plan and set aside spaces for different crops and animals. Make distinct roads and divisions to help you travel and care for your farm.
- Plan up your farm plan and set aside spaces for different crops and animals.
- Make distinct roads and divisions to help you travel and care for your farm.
- Rotation of Crops: Crop rotation involves rotating the types of crops planted in each region. This helps to minimise soil depletion and increases agricultural efficiency.
- Crop rotation involves rotating the types of crops planted in each region.
- This helps to minimise soil depletion and increases agricultural efficiency.
- Water Management and Irrigation: Ensure your crops have access to water sources, or install irrigation systems such as water channels. Keep an eye on the wetness of your field, since crops require moist soil to thrive.
- Ensure your crops have access to water sources, or install irrigation systems such as water channels.
- Keep an eye on the wetness of your field, since crops require moist soil to thrive.
- Breeding of animals: Animals should be bred on a regular basis to guarantee a healthy population and a consistent supply of resources. Keep an eye on the food requirements of each animal kind and feed them appropriately.
- Animals should be bred on a regular basis to guarantee a healthy population and a consistent supply of resources.
- Keep an eye on the food requirements of each animal kind and feed them appropriately.
- Light and safety: Use torches or other light sources around your farm to prevent hostile mobs from spawning and harming your crops or animals. Build fences or barriers around your farm to protect your livestock from predators.
- Use torches or other light sources around your farm to prevent hostile mobs from spawning and harming your crops or animals.
- Build fences or barriers around your farm to protect your livestock from predators.
- Replanting and harvesting: Harvest ripe crops on a regular basis to provide a steady supply of resources. To guarantee a sustainable agricultural cycle, replant seeds soon after harvesting.
- Harvest ripe crops on a regular basis to provide a steady supply of resources.
- To guarantee a sustainable agricultural cycle, replant seeds soon after harvesting.
- Organisation and storage: To organise and store your collected crops, animal products, and agricultural implements, build storage systems called chests. To quickly discover what you need, label chests or utilise various sections for different resources.
- To organise and store your collected crops, animal products, and agricultural implements, build storage systems called chests.
- To quickly discover what you need, label chests or utilise various sections for different resources.
- Diversification and Expansion: Consider extending your farm as you go by adding more crops, animals, or even automated systems like redstone-powered farms. Experiment with various crop and animal combinations to diversify your resources and boost efficiency. Maintenance on a regular basis: Check-in on your farm on a regular basis, and solve any difficulties such as crushed crops, escaping animals, or broken fences as soon as possible. Maintain your farm’s overall health and output by remaining watchful and proactive.
- Consider extending your farm as you go by adding more crops, animals, or even automated systems like redstone-powered farms.
- Experiment with various crop and animal combinations to diversify your resources and boost efficiency.
- Maintenance on a regular basis: Check-in on your farm on a regular basis, and solve any difficulties such as crushed crops, escaping animals, or broken fences as soon as possible. Maintain your farm’s overall health and output by remaining watchful and proactive.
- Check-in on your farm on a regular basis, and solve any difficulties such as crushed crops, escaping animals, or broken fences as soon as possible.
- Maintain your farm’s overall health and output by remaining watchful and proactive.
You can manage and maintain a profitable farm in Minecraft by following these recommendations. To guarantee a successful and effective farming business, remember to change your ideas as you go and to constantly be alert to the demands of your crops and animals.
Advanced Farming Techniques
Automating crop harvesting and creating complicated animal breeding systems in Minecraft may substantially improve your farm’s efficiency and output. Here are some suggestions for each:
Crop Harvesting Automation Using Redstone Mechanisms:
- Harvesting by Observers: Set up an observer block in front of the crops. When the crops attain maturity, the observer block will send out a signal. Create a device with Redstone that activates pistons to automatically shatter the crops and gather the goods.
- Set up an observer block in front of the crops.
- When the crops attain maturity, the observer block will send out a signal.
- Create a device with Redstone that activates pistons to automatically shatter the crops and gather the goods.
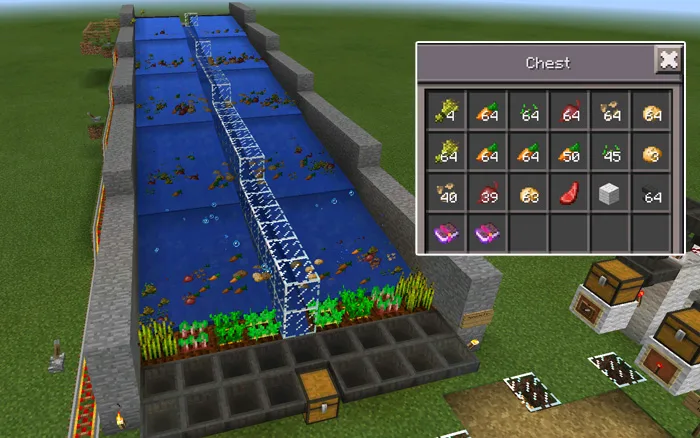
- Harvesting of Water: Construct a water canal system that runs through your land. When the crops have reached full maturity, engage a lever or button to discharge water and wash the crops into a central collection point. Collect the goods as they trickle down the canal using hoppers.
- Construct a water canal system that runs through your land.
- When the crops have reached full maturity, engage a lever or button to discharge water and wash the crops into a central collection point.
- Collect the goods as they trickle down the canal using hoppers.
- Harvesting carried out by villagers: Use people to automatically harvest the crops. Create a people-powered system in which villagers identify fully grown crops and break and collect them automatically. Using water currents or hoppers, transport the objects to a central storage place.
- Use people to automatically harvest the crops.
- Create a people-powered system in which villagers identify fully grown crops and break and collect them automatically.
- Using water currents or hoppers, transport the objects to a central storage place.
Designing Complex Animal Breeding Systems
- Segregation and Separation: Create distinct cages for each animal kind. Control animal mobility with fences and gates to avoid unwanted breeding.
- Create distinct cages for each animal kind.
- Control animal mobility with fences and gates to avoid unwanted breeding.
- Breeding Robots: Make use of dispensers to automatically dispense food for breeding animals. Connect the dispensers to a Redstone clock or observer system to schedule the breeding process.
- Make use of dispensers to automatically dispense food for breeding animals.
- Connect the dispensers to a Redstone clock or observer system to schedule the breeding process.
- Transportation and sorting: To move animals to selected breeding regions, set up water streams or minecart networks. Separate animals based on their kind or breeding status using trapdoors, pressure plates, or other devices.
- To move animals to selected breeding regions, set up water streams or minecart networks.
- Separate animals based on their kind or breeding status using trapdoors, pressure plates, or other devices.
- Item Collection and Automatic Killing: Use Redstone systems to automatically murder superfluous animals in exchange for their drops. Collect dropped goods with hoppers and move them to a storage system.
- Use Redstone systems to automatically murder superfluous animals in exchange for their drops.
- Collect dropped goods with hoppers and move them to a storage system.
To identify the most efficient and successful solutions for your farm, remember to experiment and iterate on your designs. These concepts serve as a starting point, but the possibilities are endless thanks to Minecraft’s redstone physics and inventiveness. Have fun creating and deploying automated systems to help you with agricultural harvesting and animal rearing.
Conclusion
Finally, understanding the skill of farming in Minecraft is critical for survival, resource harvesting, and developing a sustainable food supply. Players may construct effective and efficient farms inside the game by learning the basics of agricultural development, animal farming, and automation techniques.
Choosing an appropriate location, clearing the ground, and tilling the soil are all important phases in preparing the farm for crop production. Obtaining seeds from tall grass and becoming acquainted with many crop varieties allow for a diversified and prosperous farm. Ample lighting and water sources are essential for good crop development and a plentiful yield.
Animal rearing adds another layer of complexity to the farm by giving a variety of resources and breeding possibilities. A flourishing animal farm requires the ability to manage and sustain animals in enclosed settings, feed them effectively, and comprehend the natural breeding process.
Furthermore, using Redstone methods and automation approaches can considerably improve agricultural harvesting and animal breeding efficiency. Players can save time and effort while increasing farm productivity by using observer-based systems, water-based procedures, or complicated redstone contraptions.
Players may develop and maintain successful farms that not only offer nutrition but also function as a renewable resource centre within the Minecraft world by adopting these methods and approaches. Farming in Minecraft allows users to embrace self-sufficiency and succeed in their virtual endeavours, whether it’s planting crops or rearing animals. So gather your tools, till the soil, and set out on a mission to become a skilled farmer in the fantastic world of Minecraft.
Further Read:
How to Create Custom Minecraft Skins: Step-by-Step Tutorial
Comprehensive Minecraft Guide for Beginners
DCS World With Virtual Joystick, Keyboard & Mouse [NO HOTAS]